
My son wanted me to make a gluten free cherry pie, but I didn't like any of the recipes I was finding online. I ended up doing a combination of following a crust recipe then calling my mom and just winging the rest!
What you will need for the crust:
2 1/2 cups gluten-free flour mix
• 2 tablespoon sugar
• 3/4 teaspoon salt
• 1 cup (2 sticks) chilled unsalted butter, cut into 1/2-inch cubes
• 5 tablespoons (or more) ice water
The recipe did not call for this, but after eating the pie and reevaluating, I would go back at add vanilla or almond extract to add a bit more flavor to the crust.
Instructions:
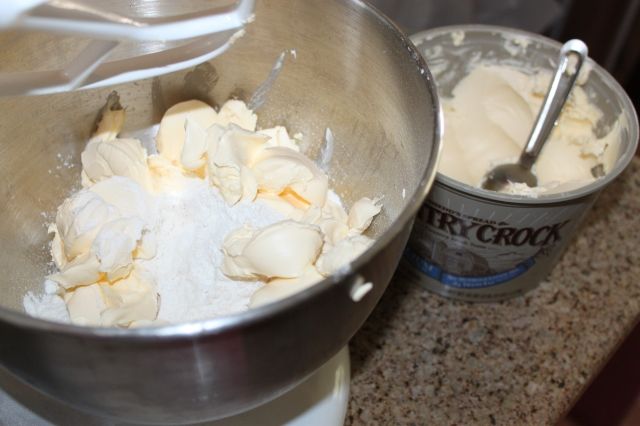
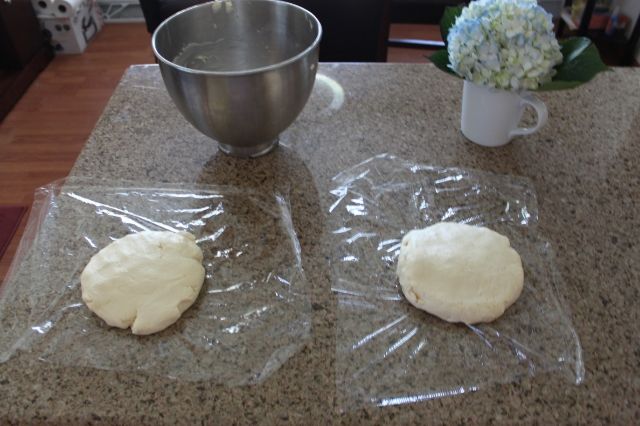
Whisk gluten-free flour, sugar, and salt in large mixing bowl to blend. Add butter and mix gently or rub in with fingertips until small pea-size clumps form. Add 5 tablespoons ice water; mix lightly until dough holds together when small pieces are pressed between fingertips, adding more water by teaspoonfuls if dough is dry. Gather dough together; divide into 2 pieces. Form each piece into ball, then flatten into disk and wrap in plastic. Refrigerate at least 30 minutes. Do ahead: Can be made 2 days ahead. Keep chilled. Let dough soften slightly before rolling out.
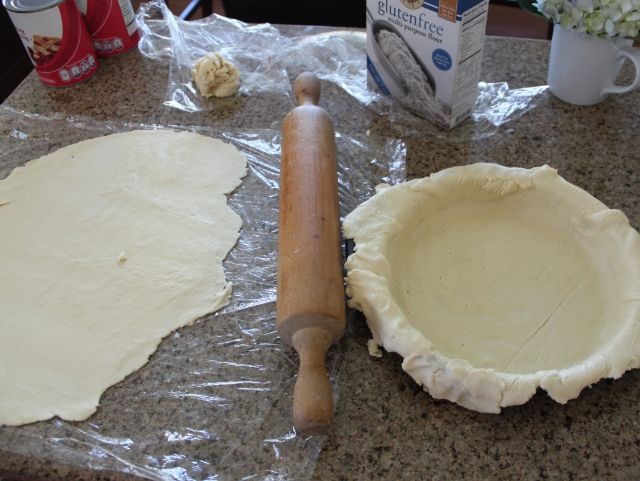
After my dough had been refrigerated I used my vintage rolling pin and some extra gluten free flour and rolled my dough. When I got it to the proper thinness, I flipped the crust into the pan as the bottom.
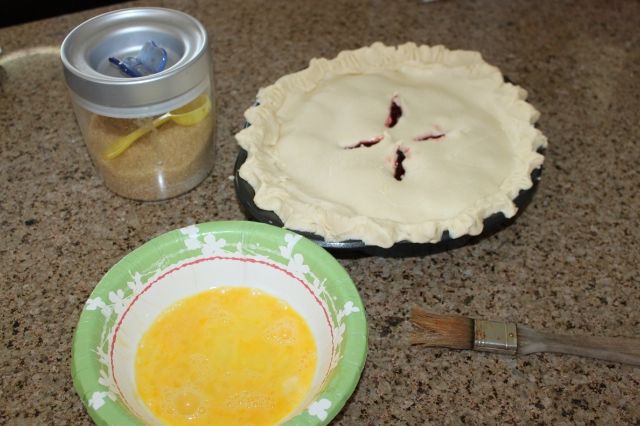
Using 2 cans of cherry pie filling I filled the pie. Next I rolled out the second piece of dough I flipped that one on top and began to connect the edges. I not only used a fork to secure, but also pinched the ends. I also cut four holes in the top of the finished pie. You can get creative and make shapes or even weave the top crust. It's totally up to you!
Before putting in the oven (at 450 degrees), I brushed the top with egg and sprinkled with raw sugar.
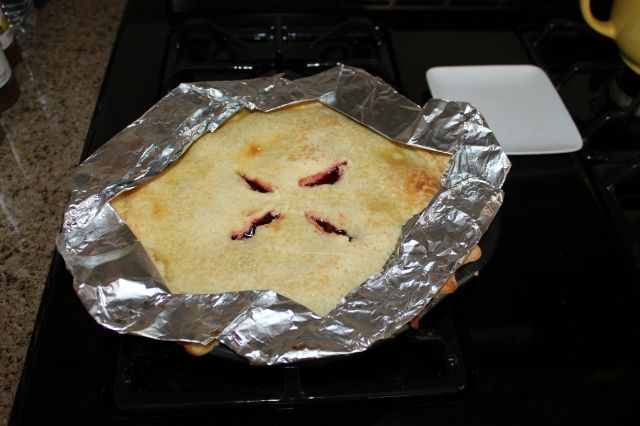
Bake for 20 minutes then add the aluminum foil to the ends and cook for an additional 20-25 minutes or until golden brown. (Using aluminum foil I made a crust cover to avoid burning. They do sell crust covers so if you own one, use that!)
Here is my finished product:
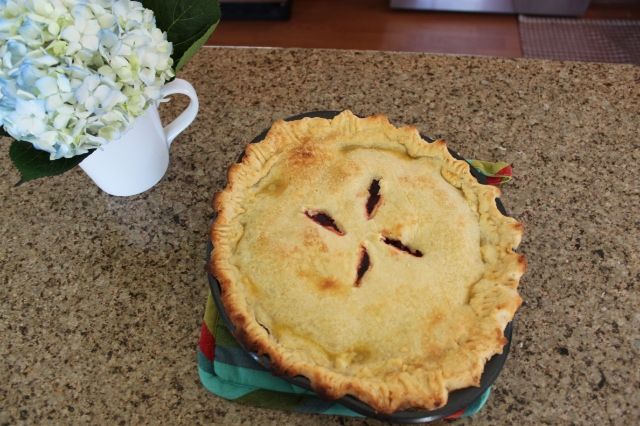
The pie turned out great. Like I said above, next time I will add vanilla or almond extract to the dough to give it a bit more flavor. Other then that, I would maybe add ice cream or whip cream to the top, but it was darn good if I don't say so myself. Not bad for my first pie and winging it! ;)
What's your favorite pie? We'd love for you to share in the comments if you have a favorite recipe for us to try!
What you will need for the crust:
2 1/2 cups gluten-free flour mix
• 2 tablespoon sugar
• 3/4 teaspoon salt
• 1 cup (2 sticks) chilled unsalted butter, cut into 1/2-inch cubes
• 5 tablespoons (or more) ice water
The recipe did not call for this, but after eating the pie and reevaluating, I would go back at add vanilla or almond extract to add a bit more flavor to the crust.
Instructions:
Whisk gluten-free flour, sugar, and salt in large mixing bowl to blend. Add butter and mix gently or rub in with fingertips until small pea-size clumps form. Add 5 tablespoons ice water; mix lightly until dough holds together when small pieces are pressed between fingertips, adding more water by teaspoonfuls if dough is dry. Gather dough together; divide into 2 pieces. Form each piece into ball, then flatten into disk and wrap in plastic. Refrigerate at least 30 minutes. Do ahead: Can be made 2 days ahead. Keep chilled. Let dough soften slightly before rolling out.


After my dough had been refrigerated I used my vintage rolling pin and some extra gluten free flour and rolled my dough. When I got it to the proper thinness, I flipped the crust into the pan as the bottom.
Using 2 cans of cherry pie filling I filled the pie. Next I rolled out the second piece of dough I flipped that one on top and began to connect the edges. I not only used a fork to secure, but also pinched the ends. I also cut four holes in the top of the finished pie. You can get creative and make shapes or even weave the top crust. It's totally up to you!

Before putting in the oven (at 450 degrees), I brushed the top with egg and sprinkled with raw sugar.

Bake for 20 minutes then add the aluminum foil to the ends and cook for an additional 20-25 minutes or until golden brown. (Using aluminum foil I made a crust cover to avoid burning. They do sell crust covers so if you own one, use that!)

Here is my finished product:

The pie turned out great. Like I said above, next time I will add vanilla or almond extract to the dough to give it a bit more flavor. Other then that, I would maybe add ice cream or whip cream to the top, but it was darn good if I don't say so myself. Not bad for my first pie and winging it! ;)
What's your favorite pie? We'd love for you to share in the comments if you have a favorite recipe for us to try!


This was absolutely delicious!
ReplyDelete